This is a science experiment I did with my kids AGES ago...when my kids were so much smaller. I loved how ARTSY this science experiment was.
It's fun and fairly simple. You will need:
A shallow pan or bowl
Milk
Food coloring
Dish soap
Fill the pan with milk. Drop several drops of different colored
food coloring in different places in the milk. Then, squirt a small
drop of dish soap in the middle of the dish soap. The colors will start
to swirl as the dish soap reacts to the protein in the milk. Like
this...
Isn't
that cool! Of course, if you want to keep this "artwork" to hang on
your wall then you'll have to take some pictures like we did. I love
how this also caught the reflection of the lights above our table.
Pretty cool!
LESSON IN COLORS
Use red, yellow, and blue food coloring to help teach younger children what colors are created when those colors mix.
EXPLORING DIFFERENT TYPE OF MILK
The blogger from Tots and Me commented that she tried this experiment with milk with different fat contents (1%, 2%, Whole, etc.) and that it does change the reaction.
THE SCIENCE BEHIND IT
I found this description of what causes the colors to swirl on About.com:
"The
detergent lowers the surface tension of the liquid so that the food
coloring is free to flow throughout the milk. The detergent reacts with
the protein in the milk, altering the shape of those molecules and
setting them in motion."
So, what is "surface tension?" You can learn more about it and do an easy experiment to find out here.
You can follow up/review this info while cleaning. When cleaning a greasy pan have children observe what happens to the grease when you fill a pan with water and then add a drop of dish soap (the grease will go to the edge of the pan). Talk about how that's the same thing that happened when we did the milk experiment. Talk about how soap works to help get rid of grease.
I know this is labeled as a "Story of the World" post, but we actually didn't use the text for this lesson. However, all the activities work perfectly with Chapter 4 - Making Mummies. If you aren't using Story of the World, these activities would make a great little unit study on Egyptian Mummies!
We had already read about the mummification process in several different library books on Egypt, so I wanted to take a different tack and look at the science behind how mummification works.
Nit-Picky Fact Check: Technically,the mummification process described in Chapter 4 of Story of the World was really not fully developed until the New Kingdom (though I don't know if I would have cared enough to tweak this if there hadn't been other reasons to).
For our alternative text we used a page from "Science of Ancient Egypt: Mummification" (part of a larger bundle on Ancient Egypt by Dr. Dave's science which I bought after falling in love with his free sample unit on The Nile). It covered some things that the other books we read didn't about the science behind making mummies (like how microorganisms are involved in breaking down bodies, and how Natron, the salt mixture the Egyptians used in mummification, prevented these from growing by removing moisture).
While the Unit Study was for 4th - 7th graders, we did this when my son was a 1st grader with a Kindergarten sized attention span. I felt like the material was engaging and kid friendly enough for him to handle...especially since he loves science. (And I was right)
I didn't try to cover the whole unit though, since I knew that would be an attention span stretch. In stead I used a couple of pages from it for this lesson, and I did what I always do...added some tactiles and visuals, and of course, lots of questions.
First, we reviewed Egyptian mummification with this video...
Then, before we dug into the text, I took my son outside to see something I knew had been sitting out by the fence in our yard...the remains of a dead bird. I knew it would be a great example of what happens to an animal after it dies...and how microorganisms take part in that process (though I'm sure ants took a part too).
Feel free to save and print this picture as an alternative to
viewing a real decomposing animal.
I pointed out the bones and the beak and the feather, and asked my son "What do you think happened to the rest of it, all the bird's muscles and stuff?"
He gave a guess about the bird going to heaven (theology lessons pop up when least expected, don't they?).
"Well, the Bible doesn't say whether birds go to Heaven. Some people think they do, and some people don't, but we don't know. But when people go to Heaven it says God gives us new bodies...so our old bodies stay here when we die. So even if animals go to Heaven it doesn't mean their bodies do too. So what do you think happened to the bird's body?"
I let him give a couple more guesses and then said, "Lets go inside and find out!" That got him interested and he listened intently as I read the whole page on "Preserving the Body" which talked about how microorganisms break up and consume dead things and how the mummification process prevents that.
At that my son expressed some fears about microorganisms eating him...so I told him about how when we're living that our cells have ways of fighting bad bacteria and germs, and that other bacteria lives in our body and doesn't hurt us, but when someone or something dies than its cells die too, and so the microorganisms then start to eat the dead cells.
(Yeah, all that...it was all off the cuff and I wasn't sure if that was completely correct, though it did assuage his fears. Later I checked up on it and got this great answer from someone on Answers.com. I was pretty on target...but he gave some extra details that were really great. That answer isn't around anymore...but there's a similar one on Quora)
While the video below doesn't directly answer that question, it does describe the process of decomposition and would be a good resource to share with older kids for this study. I don't suggest this for younger kids because some of the illustrations could be scary for them (though every kid is different...you could preview it and see if you thought it would work for your child). After minute 2:27 it talks about the problem of burial space/cost and some solutions, which is not as related to this lesson, so you may want to stop there (though it is interesting).
If your kids are interested in learning more about what we do with bodies to prepare them for burial today, this page also has good information.
We skipped the next page of the mummification unit study ("Salt) to come back to after we had done our egg experiment (as it gives away the end), and read the first paragraph of "The Chemistry of Salt." This paragraph talks about how salt is a mixture and how there are different kinds of salt (even baking soda is, chemically, a salt). So, I showed him some....
Aw, the salt looks like a funny monster face.
Click on it to see the different salts enlarged.
We looked at regular salt, coarse ground sea salt, Himalayan sea salt, Epson salts, and baking soda. I left these out on a dish for him touch and play with while I read the next paragraph about natron. When we got to the last paragraph about where the Egyptians got natron (in the Natron Valley, in the Nile Delta), we looked it up on our map.
MAP TIPS: Most ancient Egyptian maps
won't have the Natron Valley labeled. It's located on the west side
of the Nile Delta (the river area shaped like a V where the Nile meets
the Mediterranean. "Wadi El Natrun"
is it's current name, which is actually Arabic (so, a later name). In
Coptic (the language descended from the ancient Egyptian language), it
is called Šihēt, meaning "Measure of the Hearts." (This may still be
tied to it being a source of the natron used in mummification, since in
ancient Egyptian religion, the heart was weighed before a person could
enter the afterlife).
Egg Mummy Experiment
We followed up our study with an experiment where we mummified a hard boiled egg. I've seen this done with apples too, or a whole chicken (as suggested in the SOTW Activity book). Several day into our experiment, we read the page on "Salt" that we had
earlier skipped, after making guesses as to why our egg had shrunk and
hardened.
Hard boil an egg (or two if you want to have a "control" egg...see section below). Peel off the shell.
Measure the egg with flexible tape ruler and write down results.
Weigh egg and write down results.
Mix an equal amount of salt and baking soda to make an approximation of natron (you can just use salt in stead)...enough to cover an egg.
Put the egg in a cup or open container and cover completely with natron mixture.
Uncover egg and repeat steps 1 - 3 every day for several weeks until the weight and size remains constant.
CONTROL EGG
We also put another egg outside in an open
container to see what happened to it (but did not measure it, because I
knew after a while we wouldn't want to touch that one). In stead we
took pictures.
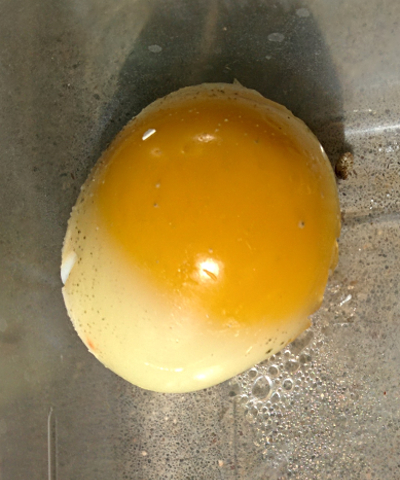
Below are our pictures of our egg mummy (left) and control egg (right). OK, yes, that first picture is the same egg reversed...cause I didn't take a picture of the mummified one before we put it in the salt. It's not consecutive days because we didn't take a picture every day (the days shown are as follows: Day 1, Day 2, Day 5, Day 9, Day 12), and the sizes are not completely to scale, though I did try to show how they shrunk (it was a little more dramatic than the pictures here show, actually). But you can still get the general idea.
Click to see larger pictures.
(We missed taking a picture of the mummified egg that last day shown, but I thought the changes in the other egg were interesting). The control egg eventually withered away to nearly nothing and we tossed it. The mummified egg eventually turned rock hard and gray, but alas I
didn't take a final pic. I left it outside and then forgot about it a long time and it was gone (guess it didn't stay forever, but we live in a humid area, not the dry Egyptian desert). Plus, some animal may have eaten it.
This was a fun lesson and my son really enjoyed it. I would recommend this experiment for any kids interested in mummies.
Post contains some affiliate links, through which I can earn commission.
Mostly for books, which I suggest looking for at your local library.
This section is about the Nile river, and about the king who united upper and lower Egypt into one Nation. Because my son has a short attention span, we broke up the section into two parts to shorten it--and to shorten it a little more I crossed out a few lines here in there (this was one of our "Readers Digest Condensed Chapters *wink*). We also did what we usually do--stopped and asked questions during the text and looked at pictures from other sources which we read.
We had a lot of resources for this and didn't use all of them, but I'll share some good resources we found to add visuals below. Finding books on Egypt than contain good illustrations of the things mentioned in this chapter is EASY. If you don't have the books mentioned below, you should be able to find something else in your local library that works.
DAY 1 (Paragraphs 1-4) Farming on the Nile
Before Reading
Before starting the reading we looked at some maps of Egypt and then found where it was on a world map.
Paragraph 1 -2
These paragraphs can be supplemented with a map from the activity book, but we had a full color illustrated map I thought he'd enjoy more (from the Usborn Time Traveler), so in stead of coloring the map, I had my son find the Nile Delta on that picture.
I like the colored map too because it showed a green area around the Nile, and pictures of desert outside that area, so I could ask my son where people could live and farm. We also looked at an aerial picture of Egypt that showed how green that area around the Nile actually was. Seeing real pictures really brings home the difference between the area near the Nile, and the desert surrounding it. (More map/picture suggestions below)
Also, this is one of the places where I edited out a few lines (about the word Delta being from the Greek letter "D") to make it shorter for his attention span.
This book uses dioramas to illustrate (and is full of crafts kids can do). I like how this book showed the steps in farming the land, and talked about the three Egyptian seasons.
This book on pyramids had a nice picture with a Nile map AND farming illustrations, so if you wanted to cut down on the amount of resources you used, you could just use this one for both.
Don't have any of these books at your library? There's a sample of Horrible Histories magazine that features a great Nile farming illustration (just scroll to pg 14-15).
Silt Demonstration
This activity shows how flooding brought silt onto the Nile banks.It's not amazingly exciting, but it does demonstrate the concept and my son enjoyed pouring the water.
Supplies
bowl
white piece of paper
baking pan or dish (to catch water)
dirt
water
Instructions
Place a bowl on a piece of white paper on a larger ban, dish, or lipped plate. Fill up a small bowl half way with water, and add a little dirt. Let the dirt settle.
Pour in water until the dish overflows. Note the pieces of dirt on the white paper....in the same way the Nile deposits silt on the area around it when it floods.
Egyptian Meal
You can have an Egyptian meal, like we did at our co-op. You can find a list of recipes and foods they had here.
A fun thing to talk about is how the foods they ate may have tasted
different, because years of farmers choosing seeds from the tastiest
plants changed what the plants looked and tasted like. For instance, initially no one ate the
fruit of the watermelon, but would only eat the seeds...so historians
believe that watermelon originally didn't taste sweet.
More Activities
Make a Shaduf - Egyptians used shadufs too, so if you haven't already made a shaduf for Chapter 1 (where they describe it) that could be fit in here.
Plant and Egyptian Garden - Plant a garden with food crops like the Egyptians planted (cucumbers, onions, garlic, raddish, peas, etc. See full list here.).
Learn about Egyptian Daily Life - A great follow-up on this section is learning about daily life in Egypt. I have a free Egypt Guide* with lots of pictures related to daily life in Egypt, including a comparison of a common Egyptian home vs. the home of an Egyptian elite, and a fun activity might be to create and imaginary Egyptian character and draw a room in their home. (*The guide was originally for VBS volunteers at my church when we did a living history style VBS program.)
Do Lapbook activities (scroll down for suggestions at the bottom of this page)
Make Egypt Cookies showing the Nile River and surrounding desert.
Supplemental Reading/Extension For Older Kids Nile River Unit - Dr. Dave's Science
This
very readable printable unit on the Nile River by Dr. Dave's science
makes for great extension reading to bring in some science (suggested
for ages 4th - 7th, but I think a lot of younger homeschoolers might
enjoy it too.) The free sample of the first 10 pages covers the Nile ecosystem and flooding, and the full package ($3) goes into more detail on about Egyptian farming methods, food, papyrus, and the damning of modern Egypt.
DAY 2 (Paragraphs 5-9) Upper and Lower Egypt Become One
Note that the paragraph numbers are different for the Revised and Original versions.
Paragraphs 5 - 7 (Original: 5)
For these paragraphs we again looked at the maps we had of Egypt and Africa, and pointed out all the things they were talking about. In the Revised version they explained why the names for "Upper and Lower" Egypt make sense even though it looks backwards on our maps (because in stead of "north" and "south" they thought of things in terms of the way the river flowed--"up river" or "down river"). We turned our map upside down when they mention that was how the Egyptians saw the world. After this section I stopped to ask which part was Upper and Lower Egypt and why they were called that before moving on.
Paragraphs 8 - 9 (Original: 5-6) We continued to use the maps for this section. We also looked at the single and double crowns in the page about the Pharoah in the Usborn Time Traveler (you could find pictures of these crowns in almost any picture book about Egypt, or at the links below).
Narmer Puppet - Note, this is in the free sample pages. Find a link to them under the picture of the book.
Egypt Lapbooks
Lapbooks can be a great way to
supplement Story of the World. Often they are done with file folders. I actually like using a small
blank-book in stead of the traditional folder method, and adding items
from various lapbooks as we reach those topics in SOTW. You can make
your own books with folded paper and staples or use inexpensive blank
books like these (I also often see square blank books 5 for $1 in the Dollar Section of Target).
Free Egypt Lapbook 1
This one has a nice map of the Nile with an Egyptian border, graphics of King Narmer and the double crown, among other things.
History Pockets
This
is a great resource for using while studying Egypt. Related to this
chapter it has a map of Egypt illustrated with kings wearing the crowns
of upper and lower Egypt, and excellent cut and paste activities for
life on the Nile. I was lucky to find this used at a local homeschool
sale.
We had a really fun Valentines last year...one of my favorite lessons ever.
I started planning for Valentines A LONG TIME in advance. You see, my homeschooler has two older
brothers who go to public school, and I knew he might feel a little
jealous when they came home with a bag full of Valentine's cards and
candy. So, in January I sent out requests to some other homeschoolers I knew and some of his
friends from church to send him Valentines, and we sent some Valentines
to them too. (BONUS: It was really good way to get my son to practice his handwriting!).
Then, when Valentines day finally came, here's what we did....
That morning before they woke up, I laid out a special treat for all
three boys at the kitchen table...a candy bar wrapped with a cool
wrapper I found over at Chica Club Circle. (They're big Minecraft fans. They loved it!)
After the big kids were off to school it was time for homeschool. But first, I went out to check our mailbox. My friends told me they'd sent the valentines, but NONE of them had come yet. But sure enough, there was a handwritten letter covered in Valentines stickers right on the top of the pile. I shut the box and ran to get my son so he could "check the mail." He was
totally excited to see a letter with his name on it and find the Valentine with the sucker from his friend inside (and even more excited when the other Valentines came a little later).
While he ate his sucker I read him the passage on love from Corinthians
13. Then we drew a picture of something we could do to show someone we
loved them, using a page from a freebie by A Cupcake for the Teacher.
I tried to get him to write a description too, but he was resistant. I had planned this to be a fun day, so I let it slide.
By the way, that's
a picture of someone giving someone else a flower. Why the broken
heart? He says that means love. Ok... We'll sort that out later.
ACTIVITY 2: Candy Heart Mustache Measurement
Then I brought out the candy hearts! After reading a few, and eating a few, we measured
some mustaches and lips with them
(using another cute TPT freebie, by Mrs. Wheeler ).
ACTIVITY 3: Candy Heart Sorting and Graphing
That wasn't the only thing we did with candy hearts...next we practiced sorting and graphing with them too! (Free printable by Dear Wellington)
ACTIVITY 4-5: Candy Heart Science
PART ONE: Candy Hearts ON FIRE!
Then it was time for some Valentines science. When I told my son we were going to do an experiment with the
candy hearts, he got all excited and, looking over at a candle I
had burning, said "I think if you burn a candy heart it will melt!" Well,
that was NOT the activity I had planned, but THAT was worth changing plans for! (I mean, what DO candy hearts do when they burn? Would they even burn at all? Now I wanted to know too!)
So I got some tweezers and held a heart over the candle, and oh, cool
things happened! Not only did the heart catch on fire, but it fizzed as it burned, and then melted....or at least that's what I THOUGHT until I did some more research. Sugar, I learned in a very interesting article, technically caramelizes, but doesn't really melt. A scientist friend of mine told me the fizzing is due to impurities (air pockets and such) in the candy.
(WARNING: Candy hearts are VERY flammable...though it's easy to blow
them out and it is a slow burning flame. And we had water to dunk them in in case that hadn't worked.).
PART 2: Sink or Float?
After we had our fun burning hearts, we did the experiment I had planned: a sink or float
activity. Candy hearts do some fun
things in soda...first they sink, but then as bubbles form around them they will pop to the surface (and then sometimes loose their bubbles and sink again)!.
My son loved it, and played with the hearts in the liquids for at
least a half hour afterwards.
(I just have to pause here and say, this is why I love homeschooling: the ability to, impromptu, do a science experiment INVOLVING FIRE, or being able to take 30 unplanned minutes to just play.).
Lastly, we did an art project with toilet-paper rolls and paint. Very fun.
We just folded a toilet paper tube like a heart,
dipped it in paint...
...and stamped it!
One of the types of paint formed bubbles, which covered the whole end of the heart sometimes (and made the solid silver hearts above)...that was kind of a cool surprise. Really, just one of many surprises that day.