I've done this craft with several kids I nanny or tutor, ages 4-7. All enjoyed it and had fun. It's a pretty quick one...takes 10-20 minutes.
The first time I tried this we cut out paper circles for eyes...the kids really struggled cutting those small circles, even the 7 year old. That's why I switched to googly eyes the next time I did this.
SUPPLIES NEEDED:
Cardstock or construction paper in the following colors:
Black
White
Orange
Light Blue
Glue (I prefer glue sticks for this one) Large Googly Eyes
It's fairly straight forward.
1. Cut off the bottom of white sheet of the paper, about 2-4 inches up for the snow in the background. You can make the cut a little curvy, or go straight across. Glue this to the bottom of your light blue paper.
2. Cut a black tall oval a little bit smaller than your blue paper. Glue it on the paper so it's sitting on top of the snow.
3. Cut a white oval shorter and less wide than your black oval. If it doesn't look big enough to put a face on the black, cut it down a little more. Glue it towards the bottom of your black oval.
4. On the edge of a black paper, cut two thin semicircle to make the wings. They should be about half the length of the black circle that makes the penguin body. You can cut them separately like in the penguin above, or fold the paper in half first so you can cut two wings at once. Glue those on the edge of the black and white circle, so that the top part is fully in the in the black area, and the bottom sticks out into the blue background.
5. Glue your googly eyes to the top of your penguins head.
6. Cut a small triangle for the nose. With younger kids I just had them cut a corner off an orange paper. Glue it under the eyes.
Making torn paper mountains is a fun, really easy artwork you can do with kids of almost any age (or even adults!).
Supplies:
Different color paper Glue Scissors (optional, for second part).
You
will need different shades of paper. In mine I used different shades of purple cardstock, plus black for silhouettes in the front and a blue background. Shades of green or blue look nice too, or you
can also do this with multiple colors of paper, or even patterned paper, for a different look.
First, tear the paper in a zig-zag or wave pattern to make mountains.
Before gluing anything down, you
might want to suggest your kids figure out what order they want their
mountains in.
While it seems obvious, as adults, that you have to glue the mountains in the background first, you may need to explain
that to your children. I've done this with two groups of kids now, and
I notice little kids often start by gluing the mountain in the foreground, even though that needs to go over the the other mountain.
Also, if you are going to add trees (see below) decide if you want any between your mountains before gluing.
OPTIONAL - ADD A TREE
The mountains on their own look beautiful, but if you want you can add a silhouette of a tree, or a few trees, like the ones I cut out here.
Here are several arrangements I tried of my trees...I encourage kids to move around their pieces and find the way they would like them to be placed before gluing.
crumbly. "Texas clay" straight out of my back yard
worked much better - it dried solid like rock.
Back in 2010 our church did an Egypt themed VBS that included
making mud bricks, and I can tell you, it was a blast. It's cheap, fun
and really does give kids a glimpse into a common part of life in ancient Egypt (and lots of other
places in the ancient world where people made their homes
out of mud brick, such as Mesopotamia, the Indus Valley civilization, and ancient Nubia).
For these instructions I consulted the instructions on the Biblical Archaeology website and several other websites (see sources at the bottom of the page) and added some suggestions we learned while doing this project with groups of kids age 4-11.
MAKING THE BRICK MOLD
There are two main ways to make your brick mold...single-brick molds or multi-molds. Both use the same basic materials.
MATERIALS:
Nails 1x4 or 2x4 (to be cut into smaller lengths)
SINGLE-BRICK MOLDS
The brick molds shown below were made by cutting 1x4 or 2x4 boards into smaller sections and nailing together in the pattern you can see below. Ours were a little narrow (making 2" wide bricks...3" wide are better). For 3" wide bricks cut wood in the following dimensions
FOR 1x4 5" end pieces 6" side pieces
FOR 2x4 7" end pieces 6" side piece
You can of course go a little longer or shorter if you want, for different sized bricks.
Then you nail the ends together.
Note that actual Egyptian brick molds may not have used nails. There's a picture of an ancient Egyptian mold here, and it looks like it was made with joinery (interlocking wood joints). Off Grid Web also has an article showing how these can be made without nails (though it looks like a rougher technique than the Egyptian molds). It might be fun to show your kids, though would be much more challenging to replicate.
MULTI-BRICK MOLDS
You can also make a long mold for several bricks by using a longer piece of wood and putting slats between it, as shown here. I prefer the smaller one when working with multiple children though because it allows them to more easily remove the brick themselves, in stead of all being crowded around one larger mold.
RESERVE A PIECE FOR PACKING MUD
Whichever type of mold you use, it's helpful to reserve a short 2x4 to use to pack the mud and help push the bricks out of the mold if they stick.
MAKING BRICKS
MATERIALS: Brick Mold (see above) Bucket Dirt (see note below) Water Hay or sand (optional) Shovel, board, or other tool, to mix mud Short 2x4 (optional, see above) Plastic Butter knife for each child (optional, for smoothing top) Cookie sheet or board (optional) Spatula or other flat tool (for help removing bricks from drying surface)
For Mess Management: Towels Tarp or plastic sheet (such as a disposable plastic tablecloth or cut up trash bags) An extra bucket of water to wash in Trash bags to protect clothing
GETTING THE RIGHT DIRT The best dirt to use is a clay like dirt (not too
sandy, not too "woody").
If you live in central Texas, what is in your backyard is perfect (if you haven't amended it much). In
other places your backyard soil might be less perfect, but what is
in your backyard may still be better than what you can buy
in a garden center ("clay" dirt is a nightmare for growing most plants
in, so this type of dirt isn't usually sold).
MAKE YOUR BRICKS
1. Pick your time and prepare your location. (It's best to do this craft outdoors if possible, on a warm sunny day. Bricks can take several days to fully dry, so do not try this when rain is expected.)
If you have an outdoor location, hard ground or cement is preferable. If the only outdoor location has grass, you will need boards, cookie sheets, or other flat hard surfaces to put your bricks on. If picnic tables are available they work well...but remember to cover them with a plastic tarp or disposable tablecloth.
If you are doing this in an indoor space you will want to lay out a tarp to contain the mess, and cover any table you use (a cut up trash bag can work if doing this with just your own children). You will still need to take the bricks outside to dry. To make it easier to move them outside I suggest getting a board to make your bricks on, or cookie sheets (using these can also allow you to do this craft outside on grass).
If doing this in a group you will also want to set up a washing station for cleaning muddy hands and have a towel set aside for wiping feet as children leave the brick making area, so they don't track mud outside that space. You will also probably want to have kids wear a trash bag with holes cut in it for the arms and head (in our camp we used pillowcases for kids to wear, which doubled as a costume once we added a colored sash).
Child playing with the muddy water we used to mix our bricks. This was not the "mud" but the water we scooped into the dirt, which is why you'll want something separate to wash with.
2. Mix soil and water in a large bucket or other container to create a thick mud (it should not be too watery). Kids really like taking part in this, usually.
3. (OPTIONAL) SEVERAL DAY STEP For a more authentic experience, and sturdier bricks, add straw ( around a half pound of straw for every cubic foot of mud mixture), and then KNEAD DAILY FOR FOUR DAYS, then leave the mixture alone for a few days before using (kneading the mixture one more time on the day you use it). This allows the straw to ferment which creates a chemical reaction in the mud that makes them three times stronger than regular clay. But, understandably, you might want to skip this, as we did, as it's time consuming (and the fermentation may possibly create a smell). Still, its good to tell kids that this was part of the original process, and what it was for. Just adding the straw without the extra days of kneading doesn't seem to add much strength to the bricks, and actually seemed to make them a little more fragile.
4. Whatever surface you've prepared to make your bricks on (unless it's already covered by a plastic sheet), distribute hay or sand on it to make it easier to get the bricks off it later (WARNING: sand can damage cookie sheets).
5. Pour the mud into the molds and pack them down with your hands or a short 2x4 piece. Scrape off any excess mud with a piece of wood or other flat tool such as a plastic knife.
6. (OPTIONAL) Let molds sit to solidify for 20 minutes. This was suggested in the original authentic method, but we were able to remove the mud from the molds right away without much problem.
7. Remove the brick from the mold. You may need to gently push them out with a short 2x4 piece or other tool.
8. If you are indoors, carefully move your cookie sheets or board with bricks outside to dry. If you are outside, leave your bricks alone. Bricks may dry in a day but can take several days. They are usually sturdy enough to transfer onto a paper plate after several hours of drying though.
MORE READING ABOUT ANCIENT BRICK MAKING These were my sources for this article, and are fun extra reads.
Africa is an area of the world that too often gets shortchanged in our study of history, so I've sought out resources to learn more about the many cultures and and people's on this vast continent.
The following is a collection of fun activities, videos, and books for learning about Africa. Some of these are things I've already shared related to our regular history lessons, but I'm collecting them here for those wanting to do a separate
Unit Study of Africa.
SECTION 1: AFRICA TODAY
This sections explores various areas and people in Africa today. I suggest doing these activities over several days.
Africa Overview
Africa is a continent with various cultures, landscapes, and over 50 different countries.
This short video gives kids an idea about how wonderfully diverse this continent is.
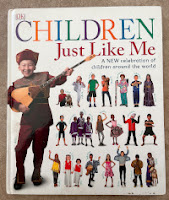
Children Just Like Me is a wonderful book that features modern children from different countries around the world, including many from Africa.
I would read about these children, maybe over several days if you have kids with short attention spans, and look up the country they are from on a map afterwards.
The newer version of this book features children from Morroco, Ethiopia, Tanzania, Botswana, Ghana, and South Africa. The older version of this book has a different set of children (from Egypt, Botswana, Ghana, Morocco, and Tanzania, and Ethiopia). Only the older book is also available free online through Open Library)
You could also see if there are any 365 degree online virtual tours in on the World Map at Round Me in the country that the children are from. I suggest letting kids explore the other "blue dots" in Africa in this site as well, as many as they would like to explore.
I also suggest Africa, Amazing Africa: Country by Country for learning more about the various countries in Africa. It explores 55 different African countries, covering cultural highlights about each in a few short paragraphs, in an engaging and kid friendly way. I suggest pairing it with Children Just like Me, reading about the countries the children come from. If you have more time, you might want to read the whole thing all the way through. And if any of the countries pique your child's interest, and they want to learn more, check out the great homeschool resource list on African and African countries here. We don't have resources on all 55 countries yet, but the list will keep growing! Also, check out the craft book under the "More African Crafts" section below...you might find a craft to go with the country you are learning about too.
When I taught about Africa in our homeschool co-op, we were learning about African history, so I decided to have the kids make a traditional round house model, a traditional style of house which can be found in many areas of Africa.
Before we
started the craft, though, I wanted to show the kids some examples of other types of buildings people in Africa live in. Because while people do live in houses like that in parts of
Africa, even today, they also live in cities like this....
So I filled up this pinterest page
not just with the traditional grass roofed round-houses, but modern
houses and other interesting buildings in various African countries (and a few landscapes just for fun). I'm so
glad I did. The kids were fascinated by the variety of houses I showed
them--they really loved seeing the different styles. And a few of the kids were really surprised to learn that African cities had
skyscrapers. Worldviews were expanded, and that made my day.
Berber Grain Silos in Tataouine, Tunisia
Photo by Asram (Self-photographed) via Wikimedia Commons
I found out something pretty cool while browsing those building pics on Pinterest. The buildings above are from a
town in the middle of the Sahara called Tataouine...and
yes, if that sounds a lot like Tatooine, the Star Wars planet, it's because it's name and style of buildings did inspire Tatooine in the original Star Wars Series. George Lucas didn't do any filming there but did film some scenes in
another nearby Tunisian town.
CRAFT: ROUND HOUSE MODEL
So, sorry I don't have pictures to share of the clay round-house, but it's pretty
simple. For a small solid
house, just roll the clay on a flat surface until you have a round tube a
little bigger than a quarter. Cut the tube down so it's not too
high. Shape the top into a cone and top with dried grass for the roof. Use a small tool like a toothpick or chopsticks to embed a "door" into the house.
More African Crafts Traditional Crafts from Africa by Florence Temko, which you can also view for free at Open Library, has lots of fun African crafts and information about the countries and areas of Africa where they originate. It would be fun to go through the book, pick a craft to do, and look up the country it's from on a map.
Folk tales are a great way to learn about an area's culture. Your best bet for finding great African Folk tales to read is just to sit yourself down in your local library in their folk tale/fairy tale section, and find the section with African books (there often is one). But, I do have a few suggestions.
Ananse's Feast - An Ashante Tale
Ananse stories are popular folk tales in West Africa. We enjoyed Ananse's Feast,
a children's book we found in our local library (you can also find it free online through Open Library). It has
charming pictures with African cultural details.
If you would
like to read more Ananse stories, there's a good chance you will be
able to find some more at your library too. Searching for these folk tales
can be a bit tricky,
though, because there are various spellings of the African names
involved ("Ananse" is often also spelled Anansi, and
some versions of these tales just call him "Spider.")
ACTIVITY: COOK AFRICAN FOOD You can cook some of the traditional food mentioned in the story for an extra activity. I did a little research and I think these are the foods that were described (though I'm not sure about the Yams...there were several recipes with yams it could have been).
Crisp Plantain - Kelewele (spicey, but spice can be reduced/omitted)
Though this book doesn't mention the spider's name, I'm pretty
sure this is another Ananse tale...this time tied to the legend of how
Kente Cloth, a traditional textile found in Ghana, was created. I
found out about this book over at Kitchen Table Classroom, and loved
it's beautiful, colorful illustrations.
You can also find this book free online at Open Library.
ACTIVITY: KENTE CLOTH CRAFT
Kitchen Table Classroom also had a fun craft you can do along with this story
making Kente Cloth patterns on paper (which you can see above). The post also talks about the meaning of the colors of Kente cloth and a little bit of it's history.
This book has favorite stories from some of the children featured in the original Children Just Like Me (the one published in 2005). Two of those stories are from Africa, one from Botswana and one from Morocco. The stories are short and the illustrations are beautiful. (Sadly, I couldn't find this one on Open Library, but I suggest it as it makes a great pairing with Children just like me. ).
I don't have activity suggestions for these stories, but they would be great if your children wanted to learn about other folk tales from around Africa.
SECTION 3: History of Africa The video and book selections below are by no means a complete history of Africa, but just a sampling of historical events from ancient history to about the 1700s. However, if you want to get a general overview, you can explore this world map through time map (focusing on Africa). Underneath the map it shows major developments during each time period.
Though Egypt is absolutely part of Africa and it's history, I am not addressing Egypt directly here because Egypt is usually well covered in any world history curriculum, while the rest of African history is often under represented. Plus it's very easy to find other resources on Egypt. I do suggest finding a good book or video on Egypt to fill this out if Egypt hasn't already been covered in your history curriculum.
Prehistoric and Ancient Africa (Kerma, Nubia/Kush)
The Lost Kingdom of Kush by TedEd (4.34 minutes) This short animated video sums up the history of the Kingdom of Kush. It doesn't get into as much detail as the video below, but is a good quick video, especially for younger kids.
Lost Kingdoms of Africa: Nubia (46 minutes) This is a great documentary, and while it's not specifically aimed at kids, my son who was 7 at the time we watched this enjoyed it quite a bit (though I skipped over some parts).
I went ahead and charted out the minutes for your convenience below, to help you decide what parts to use and good stopping points if you break this up in sections, or want to watch only part of it. However, the video I had used was taken down and I had to find another one, so this might be slightly off.
I find younger children really enjoy the first part about the Rock Gong and Rock Art, but are less interested in other parts.
0 - 4:20 - Intro
4:20 - 7:41 - Rock Gong, beginning of Nubian culture
7:42 - 10:56 - Rock Art and Climate Change (When the Sahara Was Green)
10:56 - 14:20 - Kerma (main city in Kush/Nubia) and Deffufa (huge brick structure)
14:20 - 16:48 - Kerma Pottery
16:49 - 21:41 - Kerma Burial Plot
21:42 - 21:45 - What Happened to Kerma (transition)
21:45 - 26:34 - Egyptian Invasion/Jebel Barkal
26:35 - 29:19 - Sufi Mystics Today at Jebel Barkal
29:20 - 34:40 - Nubians Regain Rule/Tarharka Dynasty
34:41 - 38:43 - Desert Encroaches/Meroe
38:44 - 40:56 - Iron
40:56 - 41:58 - Desert Encroaches Again
41:59 - 45:41 - Nomads
45:42 - End - Central Sudan (Modern Times)
The following activities would be a good follow up to this video.
ACTIVITY: SAHARAN ROCK ART CRAFT This rock art would fit in nicely after learning about
the rock art in the Sahara (first three sections of video above).
Before doing this activity I suggest looking at some examples of Saharan rock art here.
First, collect rocks to paint on. Red, black and brown are common colors for ancient rock art, because these pigments can be made more easily from things found in nature than some other colors. We just used
regular paint in these colors for the rock art painting shown below, but if you have time you can also make your own paint using minerals or gathered material, which would be really fun. For older kids, this article
has more about prehistoric paints, and they have some links toward the
bottom to paint-making activities that explores the chemistry behind it (a nice way to add in an little science).
Here's our rock art. Our son really enjoyed this.
The rock art craft pictured was actually from a craft we did while studying the Lascaux caves in France and Native American rock art in California, but when I saw the Saharan rock art I thought this activity would work well here as well.
ACTIVITY: MAKE MUD BRICKS
The
Kerma Duffafa (explored in the Nubia video above, in minutes 10:56 - 14:20) was a huge structure made of mud bricks. They most
likely made them similarly to how the Egyptians did. You can learn how to make mud bricks with your kids here. (Requires woo, mud from your back yard, and optional grass).
SUGGESTED BOOK - FOR NUBIA
Ancient Egyptians and Their Neighbors
If you want your children to learn more about ancient Nubia and do some
crafts or activities related to it, this is the best book I've found with activities on
the subject for children. It has a whole section on Nubia as well as
sections on the Hittites, Mesopotamians, and Egyptians (a small section
on the Nubian pharaohs is, if I remember right, in the section on
Egypt). The only thing I dislike about this book is that it's entirely
in black and white (save for the cover). Sadly this book is not available on Open Library.
Middle Ages to Renaissance
MANSA MUSA AND THE EMPIRE OF MALI VIDEO: Mansa Musa - by TedEd (3.54 minutes) A good short animated video about Mansa Musa, possibly the richest man who every lived, and his famous pilgrimage. I would watch this or the next video on Mali (which includes the story of Mansa Musa), but you wouldn't need to watch both. VIDEO SERIES: The Empire of Mali - by Extra Credits (Series) This animated web series covers not just Mansa Musa, but the Kingdom of Mali. It has 10 videos, each about 8-10 minutes long. I liked how this put Mansa Musa in context, and spoke more of the great civilization of Mali. (Contains some animated historical violence - preview before showing younger children).
QUEEEN NZINGA AND THE MATAMBA KINGDOMS VIDEO: Queen Nzinga Part I and Part II by Extra Credits Queen Nzinga was a 17th-century queen of the Ndongo and Matamba Kingdoms in what is today known as Angola, who fought for the freedom of her people from the Portuguese. (Contains historical violence - preview before showing younger children).
Early Modern Period I haven't done as much on the modern period, so I apologize that this is rather sparse. THE ZULU
Shaka by Diane Stanley A beautifully illustrated and well written children's book about the story of Shaka. The pictures are engaging very child friendly, though it does have descriptions of violence, so preview before reading to younger children. This book is also available for free on Open Library.
VIDEO: The Zulu - by Extra Credits (web series) A great video about the Zulu that's more kid friendly than the Shaka Zulu movie. (Contains historical violence - preview before showing younger children).
Decorating a walking stick with yarn/and cloth is a fun craft that can be simplified for a
young child, yet is still an enjoyable project for a teen or adult to do! Learn
how to make your own below!
This post contain some affiliate links through which I can earn a commission.
Finding The Perfect Stick Finding sticks for this craft is easier than you would would think. You can go to local wooded areas and look for downed branches (sometimes you'll even see downed branches on the side of the road). Or, look for neighbors pruning their trees and ask if you can take some of the branches. Once I started looking for sticks for this project, I started noticing them everywhere. You'll want sticks that are relatively straight, and about 1-2 inches in diameter. Watch out for sticks that are rotten or molded, and make sure to ask if any of the wood had been treated for pesticides (which you will want to avoid. If any of the bark seems loose, see if you can peel it off as that can be a sign there are bugs underneath. If you leave on the bark, or are able to peel the bark free, you won't have to sand it. If you choose to carve off the bark you will want to sand the stick afterwards. Bark left on may detach on it's own over time.
A good height for a walking stick is about 6-8 inches taller than a person's elbow if their arms are hanging straight down while standing (got that tip from Boy's Life). Even if you find a stick nearly the exact height you want, you may want to saw one end off to flatten out the bottom of your walking stick.
Wrapping a Walking Stick With Yarn
We
decorated our sticks with either yarn or cloth (or both). Below is a
video showing a simple way to wrap the stick with yarn. At the beginning of this
video I said that I have "a few inches of yarn." I misspoke...I actually
had a few feet...but what I meant was that I had a few inches of yarn
left over to form a "tail." You can add beads other charms to the left
over yarn tails, as shown in the picture at the top of this page (more
on that below).
I love how the yarn looked on this curvy stick.
When we did these we were looking for simple things we could do with cheep materials. If you are looking to do something more complex, you can find several more detailed techniques using Paracord (which would also be more weather resistant).
You can also wrap a stick with cloth tied in yarn (or leather).
This
is actually a useful feature as it creates a padded area for a
hand-hold (the more padding you want, the more layers you will want to
wrap around your stick). We used strips from old t-shirts, but you can
use any type of cloth you want (or even scraps of leather).
Wrapping cloth on a stick is fairly simple. First roll
a strip of cloth around the stick. Then take a long piece of yarn and
tie it tightly near to top of the cloth. Make your tie in the middle of
the yarn so you have two fairly equal lengths of yarn hanging down, and
leave about an inch of cloth above where you tie it. For a criss-cross
design, spiral one of these down the cloth, and the other in the
opposite direction, so that the two lengths of yarn criss-cross, then at
the bottom (about an inch from the edge of the fabric), tie these two
yarn-tails together tightly.
Adding Decorations
You
can add beads or charms to the strings that are left when you are done
tying your yarn. You will need beads with a hole large enough that yarn
can fit through. I look for beads with holes just slightly larger than
the yarn, because then after I've put them on the yarn, all I need to do
is tie a double or triple knot in the yarn and that holds on the beads.
You can also get charms that tie on the yarn, and those will hold up
all the beads above them as well.
Getting beads onto thick, fuzzy yarn can be tricky! But I have a trick that makes it easy! I use floss threaders
(the kind found in the dental aisle of most supermarkets). Just put the
yarn through the large hoop of the floss threader, insert the bead over
the small pointy end, and then pull the bead down over the yarn. You
can see floss threaders in use in the picture below.
I decorated some of the walking sticks with small shells. Sometimes, while walking on the beach, I find shells with holes naturally worn into them, but you can buy shells buy shells with drilled holes. Usually these holes are too small to fit yarn through, even with a threader, so I put a small diameter jump ring through the holes and then I can put the yarn through the larger jump ring.
Some Bead and Charm Ideas
(Click to see on Amazon)
Other Decoration Ideas
And a few practical considerations
You
can add lots of other decorations as well. You could use decorative
tape, paint, ribbons...whatever you can think of. You can even carve
patterns in your stick if you like to whittle. Skies the limit!
But
whatever you do keep practicality in mind. Make sure to leave a smooth
surface to hold (or a soft one). Don't put hanging beads and baubles
where it will hit your hand as you walk. Be careful of putting paint
where you will hold your stick as it might rub off over time (stains
might work better). And make sure that whatever you decorate with, it's
able to withstand a little weather and wear.
Tips for Group Projects
I originally did this project for our church's Vacation Bible School. Doing this with a larger group is different than doing it with just your own kids. You can see my suggestions for doing this project with a large group over at my other blog here (just scroll past the how-to in the beginning, since you've already read that here).
This is a craft we did at the Mayborn Museum one spring long ago. It would be a simple craft to do at home.
To make this suncatcher, or one like it in a different shape, all you need is wax paper, flower petals or leaves (just raid your garden), a pencil, a glue stick, a hole punch, and a piece of yarn or twine. You can download shapes to trace off the internet (some are suggested below) or draw your own shape. Make sure the shape is large!
Draw or trace a shape on one piece of wax paper, and then stack two pieces of wax paper together and cut around your shape.
You could cut directly on the line, but if you cut around it helps children to remember to leave an edge around their flower. Also leave space for 1-2 holes at the top for hanging.
Put glue over the middle area of one of your shapes and put flower petals down on the glue. Make sure the flower petals don't go all the way to the edge. Then trace the edges with glue again and put your second sheet of wax paper over the first. You can press down the whole sheet to press the flower petals or just press the edges together to leave the petals a little loose (like my son did). Once it dries punch your hole (you can punch it before the glue dried but the glue may gunk up your hole punch).
This is a craft I found on pinterest that we did five years ago during our first year of homeschooling (we actually did it TODAY, October 3rd!). It was simple and fun and my son loved it. I did it with him and enjoyed it too.
We did two versions, as you can see above...one with green leaves and another with fall colors. In central Texas, where we lived at the time, the leaves had not yet changed, so it made sense to start with the green leaves and then do a version that showed how they would change...as October folded into November and the leaves changed from green to orange I got to ask my son which of the trees on the fridge the leaves were looking more like now. (You could also do a spring version with shades of pink blossoms).
SUPPLIES NEEDED
Paper (I suggest cardstock or painting paper)
Compass or round bowl or lid
Pencil and eraser
Q-tips
Paint (various shades)*
Paint pallet (can be plastic or just a paper plate...or use paper cups)
*For the green tree you really only need one shade of darker green, and yellow to mix in to get various other shades. For the fall colors, red and yellow, mixed to get various shades of orange, will do. You will also need brown for the trunk.
DIRECTIONS
1. On a piece of paper trace a round circle using a lid (or draw one using a compass) in pencil.
2. Mix colors to make various shades of paint (shades of green for a green tree, or shades of red, orange and yellow for a fall tree), and brown for the trunk. Since yellow and blue make green, and red and yellow make orange, you can try different quantities of these to learn about colors while you're mixing. For brown, if you don't have that color pre-mixed, yellow, red and a small amount of black mixed can make brown.
3. Draw a brown trunk with Q-tips (or paint brush)...you can draw branches into the circle or just a straight line up to the circle.
4. With Q-tip, make dots in different colors inside the circle. Use a different Q-tip for each color.
5. Let dry, then erase circle (I didn't get pics of our tree after doing this).
In this series I share our Story of the World lesson, but even if you're not using SOTW, if you're studying ancient Egypt or Mesopotamia, you might enjoy the activities and info in this post about ancient forms of writing (Hieroglyphics and Cuneiform).
This chapter of Story of the World was easy to break into 3 different parts, which I read to my son on different days to make it easier for his wiggly wompus short attention span.
Day 1: Egyptian Writing
The paragraphs are split up differently in the Original (OV) and Revised Versions (RV), so I tried to note both locations below). I'm adding instructions for the 25th Anniversary Edition (AE), which fixed some of the issues I found in this chapter.
Paragraphs 1 - 6 (25th Anniversary Edition)
Paragraphs 1- 5 (Revised Version)
Paragraphs 1-2 (Original)
There's something interesting that you won't find in most kids books on Egypt (and that isn't mentioned in Story of the World either)...that there were TWO types of writing in Egypt.
Hieroglyphics is the type of writing most people associate with Ancient Egypt. It featured characters that looked like pictures, and could stand for either sounds or the objects depicted (more on that below). This is the type of writing has been found carved into ancient temple walls and monuments. BUT, it was not the only type of writing being used in Egypt at this time....and not even the most common type.
The common Egyptian used a shorthand form of writing called hieratic. It derived from hieroglyphics but was used alongside it, and over time it began to have a different use. While priests and monument carvers still used hieroglyphics for recording things of religious or historical importance, merchants and traders and everyone else used hieratics to write their grocery lists, records, and love notes.
I wanted to show my son not just hieroglypics, but hieratic too. Luckily, one of the books we had, Time Traveler, had a description of hieratics and hieroglyphics, along with a great example of how they were used. So, at paragrph 4, I stopped and used the Time Travelerdescriptionin stead, taking time to look at hieroglyphics in some library books about Egypt, and hieratic in pictures I found online. When I taught this section at our co-op I also used this excellent free printable comparing hieratics and hieroglyphics I had found after our lesson the previous year at home.
But I changed things up in the following lines (Paragraph: AE, RV 4, OV 2) to add some extra info.
The Egyptians use pictures to write with. We call these pictures hieroglyphs. The pictures stood for certain words. The Egyptians use to carve these hieroglyphs into stone tablets.
Hieroglyphs didn't just stand for words, they stood for sounds too...whether they stood for a sound or a word depended on context (the activity book shows this too). I realize she was trying to keep it simple, but it doesn't take much more to tell this corrently. When reading this passage you could change it like this...
The Egyptians used pictures to write with. We call these pictures hieroglyphs. The pictures sometimes stood for words, and sometimes stood for sounds. The Egyptians used to carve these hieroglyphs into stone tablets.
AND, if you wanted to, you could add in info about hieratic to it like this...
The Egyptians used pictures to write with. We call these pictures
hieroglyphs. The pictures sometimes stood for words, and sometimes
stood for sounds. The Egyptians used to carve these hieroglyphs onto stone tablets, or even into the walls of their temples.
The stone tablets lasted for a very long time--but they were heavy to carry, and carving the pictures into stone took weeks of work.
That's why most Egyptians didn't write in hierogyphys. In stead they used a type of writing we call hieratic. It was based off of hieroglyps, but simpler. In stead of carving it on stone slabs, they would write notes in ink to each other on small rocks and bits of broken pottery, which were cheap and easy to find.
You could follow that up by showing this printable picture of hieroglyphics and hieratic. There's also some really great pictures of scribe tools (including papyrus plants, which comes in handy later in this chapter) in the DK Ancient Egypt book if you have that at your library.
1. CARTOUCHE
I helped my child write his name in Hieroglyphics on a cartouche print-out from the free Ancient Egypt Unit Study at Royal Baloo (in stead of the examples from the activity book, which I thought were so-so, we used the Hieroglyphics from History Pockets - Ancient Egypt because they were simpler and larger, so easer to copy from. A quick online search will bring up lots of Hieroglyphics charts you can use for free that are also well done.
2. ONLINE GAME
We did the online Egyptian Tomb Adventure Game. It fit well with this section because it has some hieroglyphic "decoding" worked in, but it also has some map work and exploration about mummies, symbols, and Egyptian burial practices (so, you could save this for the chapter on mummies). This was very cleverly done, and my son liked it quite a lot.
3. HIEROGLYPHS AND SCRIBES PALLET CRAFT
When we did this chapter with our co-op group, I gathered up smooth rocks at a local garden center, and also broke up an old terra cotta pot, which we painted hieroglyphs and hieratic on with red and black paint (the most commonly used ink colors in ancient Egypt). Kids learning to be scribes in Egypt would practice hieroglyphs on flat rocks and broken potter too...so writing hieroglyphs on these is just as "historical" as writing on papyrus. I also made reed "brushes" and scribe pallets (a craft I found in Make It Work: Ancient Egypt) for the kids to use. Probably should have let them help me make them, but the craft involves an sharp knife, and there was mixed ages.
HIEROGLYPHS AND SCRIBES PALLET CRAFT
SUPPLIES:
For Stone Painting
Red and Black Paint (goes in Pallet if you make that)
Flat-ish stones and/or a terra-cotta pot (and hammer + trash bag or safety glasses)
For Scribes Pallet:
Balsa wood strips (find at hobby store)
Harder wood strips for base (optional...see note in instructions)
Wood Glue
Round object (see step 8)
Cardboard to cut on (a cereal box folded flat works well)
1. Collect stones or break a terra-cotta pot. It's a toss up which is better to use. The terra cotta is smoother and easier to paint on, but has jagged edges (though not as sharp as glass). Many garden centers have stones you can buy, or will not mind you taking smaller broken pieces from larger flat stones they sell. But if you choose to break a terra cotta pot with a hammer in stead, wear safety glasses OR put the pot in the plastic trash bag before breaking to keep broken bits from flying up. Make sure to sweep area thoroughly afterwards. (Fun alternative if you have a second story: clear all people from the area and toss the pot from a 2nd story window. You can tell I enjoy destruction...just a bit).
2. For the pallet, I liked using Balsa wood strips for the top part, but a harder wood strip in the same size for the back, to add strength. Because I was making several of these it was actually cheaper to do this (the harder wood cost less than balsa), but if you were making just one it would cost less to cut one strip of balsa in two and use it for both top and bottom. I found my pre-cut wood strips at Hobby Lobby.
4. Cut the bottom and top strips to exactly the same length (8 - 10 inches).
5. The original craft called for cutting out the ink wells with a craft knife, but I thought it would be easier to press them in the soft balsa wood in stead (you can see how this turned out in the pictures). It does make for a shallower bowl, so if you want to cut them out with a knife for a deeper ink well, do so during this step. Otherwise, I think it would probably avoid some of the warping I got later to press them after gluing (though I have not tried this) For the area to hold your reeds cut a rectangular strip from near the bottom of the top later of balsa wood...leaving about two inches at the top for your inkwells, as shown below.
7. Glue your top balsa piece to your bottom wood piece...put a book on top to press them pieces together while they dry.
8. To press out your inkwells (if you haven't choosen to cut them in step five), find a hard object with a small rounded surface. I used the handle of a small hammer. You could also use a screwdriver handle or even a marble. Press the rounded object into the balsa wood hard until it makes an indentation. (The example below shows only one layer because I made the mistake of pressing before gluing the top and bottom layers).
This is one step that even a young child can help with. Wha-la...your scribe's pallet is done...now it need some reeds to fill it.
9. Go outside and look for some weedy grass...something long and skinny, not wide and flat. Cut off any "seed heads" and cut into segments just shorter than your reed holder.
10. Last, put a drop of red and black ink in your pallet inkwells, grab your rocks or terra cotta pieces, and start painting hieroglyphics and hieratics!
Day 2: Cuneiform
Paragraphs 7 - 9 (25th Anniversary Edition)
Paragraphs 6 - 9 (Revised Version)
Paragraphs 3 - 5 (Original)
On the second day of our lesson we looked at the page about writing in our Mesopotamia book while we read, and found Mesopotamia on our wall map.
Afterwards we wrote a message with cuneiform in clay (I had whittled a stylus the night before). The styluses aren't hard to make...you can find a how to here. But you can also the square end of chopsticks (the disposable kind that you pull apart). It's a little harder to use but definitely gives you the feeling of pressing the symbols into the clay...as opposed to "drawing them" with a toothpick, which is really nothing like how they did cuneiform and doesn't help kids understand WHY they used all those triangles. The triangle was just a natural shape easily made by the stylus.
There's also a great video with someone demonstrating writing cuneiform here. We also made some other things with the clay afterwards. But if you don't have clay, these cuneiform gingerbread cookies (that I sadly found AFTER I did this with my son) could still give your kids the feeling of writing in cuneiform with these Cuneiform Gingerbread Cookie Tablets.
Here are some cuneiform alphabets you can try, in order of simplicity....
Old Persian Alphabet (c. 550-486 BC). Created by or under Darius I, who is mentioned in the biblical books of Haggai, Zechariah, Ezra, and Nehemiah (for those supplementing with Bible stories, around Chap 21 of SOTW).
Sumerian Syllabary (c. 2200 BC) First phonetic cuneiform, and kinda complex but older students might enjoy looking at it (symbols were by syllables, so "ba, be, bi, bu" would all be separate alphabetic symbols). Some modern scripts, such as Japanese, are structured similarly. There is a simplified sumerian "alphabet" here though.
You'll notice those are different than the alphabet in the SOTW activity pages (which is what we used when we did the project below). While I'm no expert on ancient languages, I think that alphabet is fabricated because the letters A, B, C is the same as the Babylonian cuneiform numbers 1, 2, 3 which just seems unlikely, and I couldn't find any others online that matched that.
But any cuneiform alphabet that has all the English letters will be somewhat fabricated, because some of the sounds in English weren't even present in the languages of Mesopotamia, and most (maybe all) of cuneiform was actually syllabaries not alphabets. It wasn't only Sumerian.
My son wrote a message to his friend, also doing Story of the World.
My styluses...you can't really see the triangle shape on the tip.
Our clay creations - my son made the vase and I mad the crocodile. (I was pretty proud of that crock...used the stylus to make the scales on his back)
NOTE ON REVISIONS: There were some significant changes to paragraph 5/8 in the Revised version, which you can see here. The 25th Anniversary Edition didn't include any new changes to this section.
Day 3: Papyrus
Paragraphs 10 - 12 (Original 6 - 8)
Paragraphs 10 -16 (25th Anniversary Edition)
Paragraphs 6 - 9 (Revised Version)
Paragraphs 3 - 5 (Original)
This is a section where the original and revised version have an error (but this was fixed in the 25th Anniversary Edition). Papyrus was not made by "mashing" papyrus into a pulp...this is how people learned to make paper later in China, just with different material. Mashing wood or other fibers into pulp then drying that pulp in sheets is how most paper is made today. But this was not how it was made by the Egyptians, the first inventors of paper. The Egyptians cut papyrus into thin strips, pounded them flat, soaked them in water, then overlapped the strips and flattened it even more with stones until they made a smooth sheet that stayed together.
You can see how the Egyptians made papyrus in the video below. They also demonstrate how strong this paper was (really quite tough). It holds up much better than modern paper does, which is why we still have some sheets of papyrus from thousands of years ago (but of course, as the book points out, it doesn't hold up as well as stone, so we don't have as much of it).
So, we just watched this and then I sort of summarized what Story of the World said about how paper was useful in ways stone or clay wasn't, but how it didn't last as long as stone or clay so that meant that we have less of what Egyptians wrote on papyrus than what they wrote on stone. We talked something the book also doesn't mention---that common people didn't use papyrus OR stone because it was expensive, but would write on broken pieces of pottery, which also last a long time. (Broken pottery is called "ostraca" in by archaeologists...and writing messages on it was common in many ancient cultures).
WHAT ABOUT ANIMAL SKINS?
While I didn't talk about leather, I was curious if that was used by the Egyptians to write on as well, and I found out that it was when I stumbled on an article about the Oldest/Longest Ancient Egyptian Leather Manuscript Ever Found. I learned that animal skins were "considered a very precious writing material in ancient
Egypt. It was the principal writing medium to record holy texts and
great historic events as it was more practical than papyrus due to its
flexibility and durability." However, papyrus, while less durable in
the short term, held up better over time in Egypt's dry climate, where "leather objects quickly perished." They may have perished even more quickly because Egyptians hadn't learned how to tan leather to soften and preserve it, like people to the north of them in Europe had.
ACTIVITY
MAKING PAPYRUS:
We did not do an activity related to papyrus. However, there is an activity for making your own "faux papyrus" using paper strips here. I'm also very curious whether you could make any sort of paper, in small amounts, by pounding, weaving and drying regular grass (the wide flat kind). It would not have the same exact properties of papyrus, but it would be a fun experiment to try. I've heard that "fake papyrus" has been made from palm fronds, so if you live where you could get a palm leaf, that would be something fun to try also.



 I also suggest


 east
east


